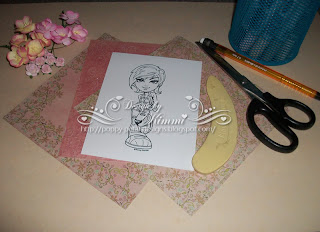
To make your own Criss Cross Pocket card you will need:
Choice of coloured A3 Card
Choice of coordinating papers (6x6)
Kenny K Image of choice (Club Kid)
Colouring medium (Copics)
Scissors/Glue/DST/Ruler/Pencil
Flowers/embellishments
Scoreboard and Score Tool
Guillotine
Start off by scoring your card. Now my way of doing this, means you do not have to attach two pieces of card together or make a smaller card so you can fit the whole thing together. My way is a bit of a cheat and you will see why in a minute.
Score your card to the size you want. My cards are usually around 15cm (just under). I will be scoring my card to 148mm.
You will notice once you score one side and the back of the card that the far side fold will be considerably shorter - Dont Panic! This is hidden when you start to stick down your card.
Take the pattered card of your choice for which you are going to place as your back ground inside of the pocket and cut it down. My card base measures 148mm x 148mm so I am cutting my patterned paper to 143mm squared to give a border when I stick it down.
Take the right hand flap and fold it over so its covering the middle patterned paper, and measure from the top right corner to the left bottom corner of the patterned base. Drawing a line with a ruler (so you can cut with Guillotine in a moment)
Then do the same for the other flap from the inner right corner to the outer bottom left.
Once you are happy that these lines are straight, cut them and they should look like this.
Take some double sided tape and run along the bottom of the centre square and stick down the flap with the bit missing....
Take the patterned paper you wish to put on the front two triangular folds and cut them down to the same size as your did for the middle panel. Once you have done this, half the paper diagonally and you should have two exact sized triangles for the folding panels.
Glue the first Right hand triangle onto the panel, once dry, place some double sided sticky along the bottom edge, This is so the Left folding panel can sit nice and snug, you will also need to glue this panel, so have some ready. here is a photo of where you should place the DST and the Glue.
Glue the second patterned paper triangle in place.
For your insert, you will need to cut the card stock down. For my card, I've gone 140mm x 135mm which means it sits snug inside the pocket. I'm cutting the patterned paper 136mm x 131mm so I have a border around the edge again. Like this:
Now you have the component of your pocket and your insert, all you have to do is decorate it, so colour your image if you've not already done so and add those flowers, trinkets, charms, ribbons and any embellishment you can think of to make it special and your own!
Happy Crafting!


2 comments:
Brilliant tutorial Kimmi, I love Pocket cards and you have made a brilliant job of showing how its done. xx
Great tutorial Kimmi, thanks for sharing it with us, one day I may follow it instead of doing my own thing.....LOL
hugs
Donna xx
Post a Comment